Sunday, February 2, 2020

Tattered Angles French Roast Color Wash Paint Vs Games Workshop Agrax Earthshade


 I was in Hobby Lobby a few days ago and I saw this "Tattered Angles" color wash tint and I wondered if it would hold up against Games Workshop shades. 

 I selected the "French Roast" color because I wanted to see how it looked against Agrax Earthshade and it looked like the darkest brown wash available in the line.  The "Tattered Angles" line comes in 59ml bottles for $2.99 U.S. vs the 24ml Games Workshop bottles that I payed $7.50 U.S. for at my FLGS.  Now the "Tattered Angles" web site had these colors listed for $4.99 and the Games Workshop site had their shades listed at $7.80 but the Tattered Angles is a clear winner on price for volume. 
   

I painted up a couple of zombie miniatures with as close to an identical paint job as possible.  I used cheapo Delta Ceramcot for the base.  The only difference between the two zombies is their hair color.


I applied both washes liberally straight from the bottle with no dilution.  I could tell at this point that the French Roast was going to be a darker and cooler wash than the Agrax Earthshade.  Tattered Angles do have a "Latte" color that I may try to see if it matches Agrax Earthshade better.  Both washes seemed to behave in a similar fashion flowing nicely into the recessed areas without tide marks or over staining the highlights. 


Both washes dried as I expected.  The Agrax Earthshade was warmer and lighter in tone.  The French Roast was cooler and a little darker.  I think both shades preformed nicely.  I have a slight preference for the Agrax Earthshade on this model but I'm not put off by the French Roast now that I know how to handle it.  I think it will make a particularly nice armor wash.  For the price difference I really like the Tattered Angles wash.  It did seem to dry a little flatter than the Games Workshop shade which some people may or may not like.  If I was needed a dark wash for a big project I would seriously consider it.  

Wednesday, January 29, 2020

Painting my Warlord English Civil War Plastic Musketeers


I purchased a Pike and Shotte Infantry Regiment plastic boxed set of miniatures from Warlord Games a few years ago with the intent to use them for a swashbuckling style D&D campaign but that campaign died after a few sessions and I shelved the minis among my vast hoard of unpainted minis.  Recently my son has decided to get into wargaming but he is primarily interested in historic.  I have an 11 year old "Old Man" wargamer it would seem.  So I dug these out and we put some together. 

The kit is pretty nice but it does have a few flaws.  There are exactly enough heads for the miniatures in the kit.  Not one extra.  Don't drop one.  There also aren't many arm/weapon options.  You have to figure out which ones work with which bodies and not mess that up and there aren't a lot of options or left overs when you are done.  Also the pikes on the pikemen break if you breathe too heavily.


I primed these with Dupl-Color Sandable Automotive Primer in black because it's my favorite primer for metal an hard plastic minis.  I then drybrushed them with burnt umber.  I've found as I get older that I can't see details very well when I black prime so this helps me pick up those details.  Also I left some of the areas with just the burnt umber layer.  Mostly the boots and leather gear.  The brown also set a nice tone to paint over for these models.


When I painted their coats I used three different colors of red.  One a darker cool red, one a cool brighter red, and one a warmer bright red.  This works well for figures of these era because troop uniforms carried more than in later periods.  


Here you can see more of the details with their base coats painted in.  You can see how leaving the burnt umber saved me time on some of the details.  I washed the flesh with Games Workshop Reikland Fleshshade at this point.  No highlights at all because these are rank and file minis.  


I used Games Workshop Agrax Earthshade over the rest of the figure trying to avoid the flesh areas.  This tied the colors together and provided subtle gradations.  


I did some basic highlighting on the coats, pants, and hats but allowed the shading the provide gradation for the rest of the figures.  I really like a more basic paint job for rank and file historic miniatures.  Not only do you usually have to paint more of them but they just tent to look a little nicer on the tabletop with a basic paint job.  Notice I didn't paint the eyes in for the same reasons.  
 

Friday, December 13, 2019

Revisiting a failed project. Cork Dungeon Tiles.


I made some cork dungeon tiles a few months ago using cork tiles.  I "printed" the stone floor pattern with a stamp I made from cheap Dollar Tree foam core.  The results on the left looked pretty harsh.  I never posted them here because I wasn't very happy with them.  I kept thinking about dry brushing them with a light grey so that the black shadow lines were less harsh but I kept putting it off.  Last week I went ahead and did the dry brushing shown on the right.  They really look a lot better and I can still see the lines for grid play. 
I don't know why I let these sit around for several months without fixing the problem.  Sometimes I guess you have to give projects space for a bit and revisit them later.  It only took me a few hours to fix the problem and now I have a nicer set of tiles. 


Here they are pictured with some Wizkids dungeon doors and other dungeon dressing.  I finished the doors this week though I still have four unfinished.  They really make my dungeon layout much nicer. 

Sunday, September 8, 2019

Frostgrave treasure tokens!


Our Frostgrave project is moving right along I got a set of treasure chest done yesterday for treasure tokens.  I have had these lying around for a couple of years from the first time I dipped my toe into Frostgrave.  Unfortunately my work schedule didn't allow me a lot of gaming time back then and my group wanted to play D&D so these got boxed.  I have a few other treasure tokens I have been using from D&D dungeon dressings but I wanted a nice set of chest so here they are.  Four of these are from a Mordenheim accessory kit, One is a Reaper Bones chest and treasure pile, the other is an old chest I had from a box of random minis with a book and scroll from the Mordenheim kit.  I really like the size of the smaller chest better but for now the Games Workshop chest will do. 

Thursday, September 5, 2019

Pictures of my new Frostgrave terrain being used in game.


 The Black Magic Craft inspired walls project has spiraled into a whole new set of terrain for Frostgrave and other fantasy games. 

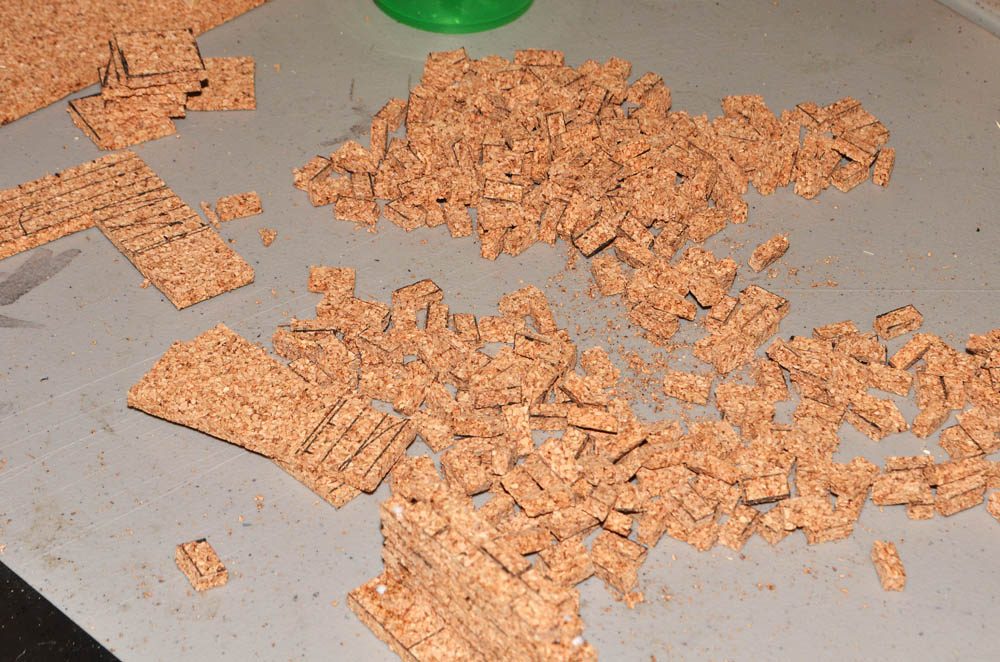
 We made several simple ruined corner structures that could be assembled into ruined structures.  These are made from cork tiles.  At first we were going to make very basic walls but they ended up looking too simple so we decided to add block structures to the corners which made them look a lot better. 


We made a large number of rubble piles from torn and cut pieces of cork tile.  A lot of these were made from the off cuts and odd pieces from the other projects.  Cork works extremely well for this type of construction.  It takes several types of glue well and it paints very easily.  


We also added some play sand to the rubble piles to give some more texture.  You can see some of the cork showing through on the rubble piles in particular but because it is a natural product it works well.  The warm tones look pretty good and help add some character to the cool grey rubble. 


We've done a lot of building with cork tile in the past but I think this has been one of the more successful projects.  We used tacky glue of the rubble walls and arched wall setions but hot glue on the corner ruins and simple ruined buildings.   


We played this particular game on a 4x4 foot table but I hope to make a 3x3 and 2x2 foot play surface.  I plan to build those surfaces with at least 2 inch sides and add arched details to the sides so I can use them as raised sections of the city on the 4x4 table.  We will also be building staircases out of cork tiles to place alongside the platform sections when they are used in that fashion.


This is just the start of the Frostgrave ruins project for us.  Next we plan to build some of the specific buildings for the scenarios in the core books.  After that we will build some more multi level ruins and some more intact structures.  Eventually we hope to start on terrain for the various scenarios in the supplements.  


Since we have a decent collection of painted Fantasy figures we don't have to worry as much about having miniatures for warbands but we do plan to build some specific warbands in the future.  We also need to address of few of the "Creature" need that we don't have covered but like the warbands we have a pretty good jump of those issues as well.  


My wife and friends and I have been very impressed with Frostgrave and other games by Osprey Games.  The miniature agnostic nature of their games is a great draw for people with a collection like ours.  The potential to bring back figures from dead games is also a major boon.  We've had the game for a couple of years not but we have only played it off and on.  I think after a couple of test games we will be kicking off a campaign and I will be posting more battle reports.  We may even start streaming the games and posting edited game videos on Youtube.  


Sunday, September 1, 2019

Black Magic Craft Ruins Painted.


 I got the Black Magic Craft style modular ruins I made from cork tile painted up.  I've had them painted for about a week now but I kept forgetting to post the results. 


 I based coated them with a Rustoleum Deep Forest Green then I sprayed them down with a medium grey from the top at a 45 degree angle.  This kept the cooler green color in the shadowed areas.  After the medium grey I dry brushed on Apple Barrel Granite Grey for the high lights.
 
 I'm really happy with the way these turned out.  My wife has finished another set and we hope to have another set and a set of accessory pieces to go along with them. 


Although we are building these walls as part of our Frostgrave ruins set they will be useful for a number of role playing games and table top miniature games.  I have several other projects in progress for our Frostgrave ruins so I will be posting more about those soon.  

Sunday, August 18, 2019

Black Magic Craft inspired Modular Ruins.


 I recently moved and when I did I moved into a much smaller home than the one I was living in.  I ended up keeping most of my miniature collection but I gave most of my terrain to my daughter and her boyfriend to use in their D&D games.  As luck would have it I was able to rent some studio space in the town I moved to for an insanely low rate so I decided since I had crafting space and playing space again it was high time to start re-building my terrain collection.


One of the YouTube channels I follow is "Black Magic Craft"  which is an excellent DIY terrain making and gaming channel that details projects with both advanced and beginner techniques.  A while back I saw him do a set of simple ruined walls which he could also use and Dungeon walls and I though it would be a good first project for my new studio.  You can find the Video here: 


 The guy at "Black Magic Crafts" does a lot of his building with XPS foam and a hot wire cutting table.  I don't have this kind of tool but I do have my trusty cork tiles and Xacto knives.  I made my first set of ruins out of one 12x12 inch cork tile.  You can get these for about $7.00 a pack at Walmart here in the U.S. and about $9.00 at Hobby Lobby or Lowles.  I find it to be a good material to work with for numerous projects.  I usually use either hot glue or tacky glue as my primary adhesive for this material.  For this project I choose tacky glue because it allowed me to adjust and even remove sections of the wall as I was building them.


The most tedious part of course was cutting the bricks out of the tile.  I chose to make my bricks 1/4 inch by 1/2 inch.  The tiles are not quite 1/4 inch thick so you need to keep that in mind when laying the brick patterns or it will throw your build off.  


My wife also made a set using similar methods.  Here she is laying the bricks out.  I would say our bricks are around 20% smaller than the foam bricks used in the original project but because the cork already has a natural texture we were able to skip the steps involved in adding texture.  It's also okay if some of your bricks are slightly thicker from side to side than others because they actually improves the texture of the wall.  I felt like this was not exactly a speedy project but I have done much more tedious builds.


I have perhaps 6 hours in this build so far and I feel like I can probably stop once I have used up one package of four tiles.  Our primary interest in making these walls is to get some terrain together for Frostgrave which is usually played on a 3x3 foot table.  We also plan to make some static ruin buildings and other features so we don't need to cover the entire space with these ruins.  I also feel like that will give me enough walls that if I ever want to use them as Dungeon walls I'll have enough for the amount of Dungeon I normally place on the table.


I'm pretty excited to get these painted.  I still need to add a bit of sand texture to the bases and some of the wall areas.  I think I may make three tiles worth of sets like this one then make some interest pieces out of the last tile in the pack.

Based on the amount of time I have in on these I estimate I'll have the build finished in another six hours at most with probably three hours of painting time.  That's a bit of a long build but it will produce a large amount of terrain so I think it will be worth the time investment.